Wednesday, January 24, 2018

Jeeto Online App Audit

There is an app on playstore by the name of "Jeeto Online".

They claim to store personal (name, phone, email, FB, physical address, IMEI ) and non-personal data under encryption .

Out of curiosity I audited the App's network transactions and could collect user's personal data simply by playing a Man in the middle.

Sample for proof : (Personal information masked for privacy reasons)
Female data points used to show the sensitivity of the leak.


Also, to prove my point I made a Solutions app for their Quiz :D using same attack.

For the curious here is my app.
https://play.google.com/store/apps/details?id=com.ideasrefined.jeetoonlineguide

So, stay vigilant when you are online. Not everything is what they say it is. Not just Pakistan, its everywhere.

Spread the message :)

Wednesday, July 20, 2016

Compiling libjingle for Ubuntu - wihtout the pain

Compiling libjingle for Ubuntu


I have spent a good few hours at trying to compile libjingle constantly failing because of one reason or the other. The README on the git doesn't help much except for laying down the foundation of what you have to do. Its more like
" there is a dark forest, and you got to go through it without a night light . After walking a few hundred meters you will encounter something  and after than you will encounter more of those and similar to reach the jingling goodness "

Anyways, I have written down the steps I used to compile libjingle. You can download libjingle from "https://github.com/Ideasrefined/libjingle" or from the official link.

Steps are as follows 


Building LibJingle for Linux

How to Build
Libjingle is built with swtoolkit ( http://code.google.com/p/swtoolkit/), which is a set of extensions to the open-source SCons build tool ( http://www.scons.org).

First, install Python 2.4 or later from http://www.python.org/. Please note that since swtoolkit only works with Python 2.x, you will not be able to use Python 3.x.

Second, install the stand alone scons-local package 2.0.0 or later from http://www.scons.org/download.php and set an environment variable, SCONS_DIR, to point to the directory containing SCons, for example, /src/libjingle/scons-local/scons-local-2.0.0.final.0/.

DONT FORGE TO DO THE FOLLOWING 

in swtoolkit/site_scons/site_init.py , make sure the following lines (450 and 330) resemble these.

Line 330:
SCons.Script.Main._load_site_scons_dir(
    str(SCons.Node.FS.get_default_fs().SConstruct_dir), site_dir)

Line 450:
SCons.Script.Main._load_site_scons_dir(
    str(SCons.Node.FS.get_default_fs().SConstruct_dir), None)
}

Third, install swtoolkit from http://code.google.com/p/swtoolkit/.
(export PATH_TO_SWTOOLKIT= )

Finally, Libjingle depends on two open-source projects, expat and srtp. Download expat from http://sourceforge.net/projects/expat/ to talk/third_party/expat-2.0.1/. Follow the instructions at http://sourceforge.net/projects/srtp/develop to download latest srtp to talk/third_party/srtp. Note that srtp-1.4.4 does not work since it misses the extensions used by Libjingle. If you put expat or srtp in a different directory, you need to edit talk/libjingle.scons correspondingly.
2.1 Build Libjingle under Linux or OS X


First, make sure the SCONS_DIR environment variable is set correctly.
Second, run talk/third_party/expat-2.0.1/configure and talk/third_party/srtp/configure.
Third, go to the talk/ directory and run $path_to_swtoolkit/hammer.sh. Run $path_to_swtoolkit/hammer.sh --help for information on how to build for different modes.
Other than above given steps, See following as reference


Install libasound2-dev Lib to compile libJingle, otherwise you will encounter errors.
sudo apt-get install libasound2-dev

Patching srtp:
comment both of the specified lines in the specified file.
third_party/srtp/srtp/ekt.c line 169  and line 181


Possible components in LibJingle Directory

libjingle-0.5.2/talk/third_party$ ls
expat-2.0.1  libudev  scons-local  srtp  swtoolkit

PATCH
Edit the the file
/talk/base/scoped_ptr.h
find all instances of "type_must_be_complete" and comment this statement

Execute following command to build LibJingle

$PATH_TO_SWTOOLKIT/hammer.sh --mode=dbg expat jingle srtp all_test_programs stunserver relayserver

Wednesday, August 14, 2013

LG SU640 Phone Drivers Download

You can download LG SU640 drivers from the download link given below.

Download LG SU640 Drivers

Official User Guide for SU640 can be downloaded from the link below.

Download LG SU640 User Guide

Thursday, August 8, 2013

A perfect cocktail of android apps on cyanogenmod roms

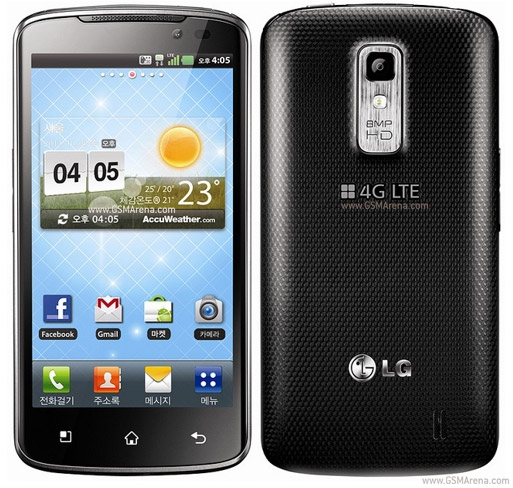
I am one of those people who like to customize their phones a little too much. I happen to have an LG SU640 (Optimus LTE)  . A mighty good phone but somehow it didn't get the due attention at the time of release.

Anyways, so I have never kept stock on my phone for more than 4 days in a row. The only time I am on stock is actually when I have to recover my phone from a dead state. Personally I prefer cyanogenmod roms, specifically paranoid android by utacka. But I have found CM Roms to be lacking the spice of the appearance.  So I have come up with a perfect mix of apps to overcome that. And here they are.


SMS
GoSms. People at Go Dev have produced really awesome apps.

Keyboard.
A.I type keyboard + windows 8 theme (available by default) + emoji plugin

Lock screen .
Go locker


Home screen ( launcher)
Nova (preferred)
LG home 3 (preferred)
Go launcher
Apex

Notes.
Color notes

Browser.
Dolphin
Maxthon

Grocery list / shopping.
BringList


Music
Apolo

Sunday, July 28, 2013

LG Optimus G Pro Wallpapers free download

LG Optimus G is a behemoth of a phone as far as specs are concerned.

Full Specs and Full Review at GSMArena.com

And an in depth comparison of two processing beasts , Samsung Galaxy Note 2 and LG Optimus G Pro, Read here


Although I don't own an Optimus G but I do have its amazing , crisp wallpapers which can be downloaded from the link below.

It also includes the famous and most demanded of em all, the black and white falling pebbles.

Preview : 


Download


Tuesday, July 23, 2013

Root and Recovery LG LU6200 ICS [Confirmed]

I have had a few queries regarding Rooting and installing Recovery on LU6200 running Stock ICS.

So here is how you can root your LU6200 and install CWM touch in less than 10 minutes.

Disclaimer: I did not write the scripts nor recovery, I found these methods on internet in other languages and I have put them here for easy access for others.

Files you need.
Root_en.zip for rooting
Flash recovery6.0.1.2.rar for ClockworkMod Recovery installation

Procedure.


Rooting


  1. Download the above files and save them to a folder e-g "c:\Lu6200_root"
  2. Unzip Root_en.zip
  3. In the unzipped folder run "LG-Optimus_LTE_rooting_ICS-JB.bat" file and follow instructions


If you follow the instructions exactly as it says to follow, you will have your LU6200 Rooted when you reboot.

Installing ClockworkMod recovery


  1. Unrar Flash recovery6.0.1.2.rar 
  2. In the extracted folder, execute "Recovery.bat" 
  3. Follow instructions ...

and voila!! you have recovery.


That is all.

Monday, July 22, 2013

LG SU640 (Optimus LTE) Modified Stock ROM V30D - Stable

I have been experimenting with different Roms for my LG SU640. I've been to CM9 , 10, 10.1 . Tried PAC Rom , paranoid ... you name it, I have tried it. But every Rom that I have tested lacks few things in particular.

Stability 
(Ability to pass a day without FC , without Reboot without hiccups)

Battery Life 
( If it passes 1.5 days with my usage*, I am more than happy)

Peace of mind 
(Not worrying about missing a call because the cell froze when it received the notification)

While other Roms are not at all useless... I particularly love ParanoidAndroid, PAC Rom is an excellent mixture of AOKP,CM and Paranoid but with all custom Roms I have had instances where I had to suffer due to either FC or a random reboot.

So, I figured maybe I should give Stocks a try, Stock official release is always slow and mostly bloated till the throat but MOST stable. And then there are Modified Stocks (technically not stock anymore :P) with stability of Stocks and optimized for performance . They contain all the useful stock apps and none of the useless bloat. The best one I've found is ...wait for it...

Sphinx v3 Supercharge 

It has

  • English language
  • Cool homescreen / icon themes , 
  • An excellent lockscreen with multiple themes same as found on LG Optimus G with awesome Drop effect (something to drool upon) 
  • Pretty neat weather app
  • One handed operation capable keyboard (you will love this feature)
  • Excellent stock dialer and contacts app.
  • Very capable Messaging app (SMS length not limited to 120 characters)
  • Notes with widgets
  • LG Q-Slide feature apps (Calendar , Calculator , Note , Browser, Video player) (True multi-tasking)
  • and much much more...


In short, I did not have to go through the hassle of installing basic software because the stock stuff is so awesomely usable.

You can get this amazing modified stock ROM sphinx v3 supercharge v6 on the links below

Original Post : here (Vietnamese)

Direct DownloadSphinx V3 Supercharge

Flashing Procedure :

Strictly follow the given procedure for best results.
  • 4 wipes (Factory defaults , Wipe cache, Wipe dalvic cache , format system)
  • Install from Zip (may take longer than other Roms)
  • Once flashed, reboot and wait ...
  • wait... wait...
  • Once you are booted into the Rom, Choose language , DO NOT sign in with Google account just yet. Skip the Google account login and let it reach the homescreen.
  • Go to applications and start Super SU, it will ask you to update SU binary, select yes and select the procedure other than through Recovery. Reboot when done.
  • After reboot, enjoy your Rom.
  • Let the system settle for about 24 hours before you give your verdict on its performance
**IMPORTANT**
Your Rom flash should take around 5 minutes. And it should take the longest on "Copying system files" message. If your flash time is less than 5 minutes, you'll most likely end up in a bootloop.

If you had 5 minutes flash and still experience bootloop then the possibility is that you ubricked using gingerbread v10i KDZ. To fix that follow the below procedure contributed by one of our users.

1. Flash v30C_00.kdz2. Root & install CWM3. Boot into recovery and do 4 wipes4. Flash this or other rom of your choice and enjoy your phone 


Some screens copied from the original forum (thats why some of them contains Vietnamese text)


Friday, July 12, 2013

LG SU640 Stable CyanogenMod 10.1.2 is out

This year has been filled with nothing but surprises for LG SU640 users. First they released a JellyBean flavored Update (Android 4.1.1) V30C, which was laggy to say the least. But after a month V30D (Android 4.1.1) was launched which had much improved functionality. These updates can be applied using LG update tool or KDZ files can be downloaded from LG website.

Then there is MIUI's latest offering which is nothing short of amazing in terms of user experience.

And today another awesome news has hit the web, CyanogenMod 10.1.1 (stable) and CyanogenMod 10.1.2 (stable) are officially available for downloads.

Complete stable repo can be found at http://download.cyanogenmod.org/?type=stable&device=su640

Enjoy everyone, our SU640 just got more awesome ^_^

Saturday, April 27, 2013

The mystery of OpenCv and BeagleBoard-XM

This guide is for anyone who is thinking of using BeagleBoard-xM DM3730's DSP for OpenCV to get an extra boost in algorithm execution. This guide is also for everyone who has just started to search for leads , hints, pointers... anything regarding OpenCV and BB-xM

I'll start by referring to a Texas Instruments White paper on OpenCV on TI’s DSP+ARM platforms. The white paper suggests that OpenCV can and is easily ported on TI's heterogeneous SoC (ARM+DSP).

This white paper lead me to believe that we have a shot at porting our current OpenCV anaytics app to an embedded platform assuming it to be a simple "Cross-compile" with the hurdles of "any other" cross-compilation exercise, but I was wrong.

Where was I wrong , you ask ?

1 - Beagleboard-xM has (DM3730) ARM Cortex A8 + DSP (C64x). ARM Cortex A8 has neon fpu but DSP (C64x) is only a fixed point DSP. So, thinking that porting OpenCV to DM3730 will yield the results I wanted to see was wrong.
OpenCV heavily relies on floating point arithmetic, and absence of a hardware fpu may not give the boost I needed.

2 - TI's claim that OpenCV has been ported and optimized for TI's multicore systems. The OpenCV port is compiled with C6EZaccel library which has been rendered obsolete by TI but is still downloadable. And a guide is available for reference on how to Get started with C6EZaccel. But C6EZaccel v2.xxx is the one with "so called" optimized port of OpenCV and that is only available for DM8148 and DM8168.

3 - TI's support will almost always point to Building OpenCV for ARM Cortex A-8 .

4 - C6EZaccel is obsolete, and hence proper support is no longer there. TI is promoting its VLIB I guess. Which leads me to believe that OpenCV project didn't go very well.

Conclusion:
BB-xM is a very good embedded hardware to start a project on. It can make use of OpenCV easily but only on ARM following the guide mentioned in pt.3 .But BB-xM is not a good choice if you are expecting a boost in performance by porting OpenCV to its DSP side.

Useful pointers:
OpenCV is a floating point depended library.
C64x is a fixed point DSP.
C674x is a floating point DSP
If you want performance in OpenCV, use IPP.


I hope this post will save a lot of days of internet surfing for many.

Sunday, February 10, 2013

LG Optimus SU640: Comfirmed working guide to Flashing Custom Rom

After three long weeks of scrounging the web for a working guide to flashing custom Roms on my LG Optimus SU640 and not finding any clear method which would simply work, I have finally come up with a method that would work just like that.

I would like to thank XDA Developers forum, a great Android Development forum which has taught me a lot.

Declaimer: None of the tools I used are my own, but the combination of what to use is entirely cooked up by me by experimentation. So if you want to copy this, please give credit and link back. And  I am not responsible if you brick your phone.

Without further ado, here is what you'll need to do .

Files you need.

SU640 Drivers : Download LG update Tool from LG website, it will package all the required drivers
Clockwork Mod recovery : Download ClockworkMod version 5.8.2.0
AllRoot tool : Download AllRoot
A custom ROM for SU640 : XDA developers
SU640 v10i_kdz firmware image. Download
LG_KDZ_FW-Update_OfflineFix  : Download  Download Originally downloaded from XDA but don't have exact link to link back

What you need to do:

Step 1 : Downgrading

Add the following line to the end of C:\Windows\System32\drivers\etc\hosts

127.0.0.1 csmg.lgmobile.com

Once you have downloaded all the files, copy them to "C:\SU640_Flashing".

Extract KDZ update tool "LG_KDZ_FW-Update_OfflineFix"

In the extracted folder, run "Automatic Offline Procedure".
Press "OK" on first two messages.
A word document will open up (ignore it), and a dialog box , press OK on dialog box. If you are on windows 7, it will show you another dialog box, press "Yes".
You will be presented with "R&D Test Tool" by LG. So far so good.


Make sure your R&D Test Tool window has the following options selected. If not, then select these, the ones marked in Red.

  1. Type : CDMA
  2. Phone Mode: Emergency
  3. KDZ file : browse to v10i_00 kdz file you downloaded
  4. Select model.dll : browse to "model.dll" in  LG_KDZ_FW-Update_OfflineFix folder.
Take out the SIM card, memory card and put your phone in "Download mode"

How to put LG SU640 in Download mode


Turn off your phone. Disconnect your cable.

Keep pressing the Volume Up button and insert your USB cable. wait a few seconds and you will enter Download mode.

Once your phone is in Download mode and connected to computer, press "CSE web upgrade test" on the bottom right corner.


A new dialog box will appear, just press "Start Upgrade"
Another dialog box will appear, select "Different country" and "English" language and Press OK.

A new old-style window will appear, and downgrading process will start. Let it finish, and don't worry if it gets stuck at 4%. Just look at the log, and it will be incrementing to 5% , 6% and so on. You'll also notice a "device model not found" message, you can just ignore it.

Your phone will reboot thrice before you see "(2001,0)" string on the Log. which means the process is complete.

Close the window using "task manager" because it will not reach 100% in progress bar and will not close.

Step 2 : Rooting

Once you have booted into the Korean GingerBread firmware, press the "Left" button and select "English".
You can skip other settings because we are not going to use this ROM very long.

In the settings, "Applications" , select "Unknown sources" , "USB debugging", and connect your phone in "LG Software mode".

Extract the "AllRoot.rar" file. and run "RunMe_En" and follow instructions on the screen.
Once RunMe_En finishes successfully, you are rooted.

Step 3 : Clockwork Mod Recovery

Turn your phone off. Insert the Memory Card and Turn on the phone.
Extract  clockworkmod version 5.8.2 you downloaded. 
Put your phone in USB storage mode and copy recovery.img from clockworkmod folder into your memory card, in "wiredsoup" folder.

Safely disconnect your phone.
Download "Terminal emulator" from Playstore.

Run the downloaded "Terminal Emulator", and type the following commands.

su
cd /sdcard/wiredsoup
dd if=recovery.img of=/dev/block/mmcblk0p13

once the final command finishes telling you how many bytes copied in and out etc, type the following command

reboot recovery
Your phone will reboot, and present you with "Clockwork Mod recovery" :) congratulations.

Now you can reboot into the korean ROM again, and copy any downloaded custom Rom to your sdcard, and flash using the recovery mode.

How to enter clockworkmod recovery on LG SU640 and Nitro HD:

One method is via terminal emulator or adb , the "reboot recovery" command.

Second method is to power off the phone. Keep pressing volume down button and power up button and wait for white text about "factory reset" and stuff. Release both buttons, and press Power button twice.


IMPORTANT:

Note 1:
Some custom ROMs will fail with "some symlinks failed "error and "status 7" . Make sure your downloaded file and original file have the same MD5 hashes.


Note 2:
Some ROMs will give an error: "assert failed getprop(ro.product.device==SU640)" or something like that.

Open that ROM using Winrar, goto "META-INF\com\google\android " and open the file named "updater-script" and remove the first line and save.

On closing the text editor, winrar will ask you if you want to replace the edited file, click "Yes" or "OK" . and flash the ROM again. This time, it will work.

Always remember to wipe before installing new ROMs.

Sunday, February 3, 2013

Rooting LG Optimus SU640 on official ICS

I recently got my hands on my first LG Android experience. LG Optimus SU640, also known as Nitro HD in US which goes with AT&T carrier.

Phone Specs:
LG Optimus LTE SU640 on GSM Arena.


Rooting Official ICS v20D firmware will allow you to debloat your device and eventually make it MUCH more responsive and make your battery last longer.

WARNING: I am not responsible if your device gets bricked , fails to boot, you lose your data etc. Although there is very low possibility of such happening if you follow my guide.

There are two methods i've found to be working on official ICS v20D for SU640.

Method 1 :
Here is what you need to do.

  1. Download Root20D.rar
  2. Extract Root20D.rar to "C:\Root20D"
  3. Connect your LG SU640 to your computer.
  4. Goto "Settings >> Security "
  5. Check "Unknown Sources"
  6. Goto "Settings >> Developer Options
  7. Check "USB Debugging"
  8. Make sure you are connected in "LG Software Mode"
  9. Execute "En_Step1.bat"
  10. Follow the on screen instructions and be patient :) 
  11. if it doesn't succeed the first time, do not give up. Just restart from Step 2.

Method 2:

  1. Download Root_.rar
  2. Extract Root_.rar to "C:\Root_ICS"
  3. Connect your LG SU640 to your computer.
  4. Goto "Settings >> Security "
  5. Check "Unknown Sources"
  6. Goto "Settings >> Developer Options
  7. Check "USB Debugging"
  8. Make sure you are connected in "LG Software Mode"
  9. Execute RunMe.bat
  10. Select "Normal Mode"
  11. Follow the on screen instructions and be patient :) 
When you see text
"Waiting for device to show up again [ali]...."

Wait for your device to boot-up . then Press "Enter"
If the process does not move forward, Press "Ctrl + C"
Press "n" for "No" and the process will proceed.


Do not install CWM on your phone yet, ICS does not allow CWM flashing on mmcblk0p13 Block. You will end up bricking it and will be presented with a pretty message.

"Security breech"
"Long time no see"

Tuesday, January 22, 2013

How to determine Endianness of a system programmatically

What is Endianness ?
Endianness is *in which order the system stores data bytes*.

For example, a Little Endian system will store lower byte of data on lower addresses of memory.

Little Endian example
Suppose an integer of 4 bytes.
Byte3 Byte2 Byte1 Byte0

Base_Address + 0 = Byte0
Base_Address + 1 = Byte1
Base_Address + 2 = Byte2
Base_Address + 3 = Byte3

Big Endian system stores upper data bytes in lower memory addresses.

Big Endian example
Suppose an integer of 4 bytes.
Byte3 Byte2 Byte1 Byte0

Base_Address + 0 = Byte3
Base_Address + 1 = Byte2
Base_Address + 2 = Byte1
Base_Address + 3 = Byte0

Interpret it like this,

int x = 1;
char * ptr = (char*)&x;

For a little endian system
ptr[0] will store 1

For a big endian system
ptr[0] will store 0

Note: ptr[0] is equivalent to dereferencing a pointer reference like this : *(ptr + 0)

Complete code

int x = 1;
char * ptr = (char*)&x;

if (*ptr == 1)
// little endian
else
// big endian

Thursday, December 6, 2012

Reset your Ubuntu password in 3 easy steps

Have you forgotten your Ubuntu password ?
Don't worry you are not alone.

Here is how you can easily reset your Ubuntu password.

Step 1 : Booting into recovery mode

As soon as you see GRUB loading screen with "Press ESC to enter menu". Make sure to press "ESC key".


You will be presented with options to boot into "ubuntu xx.xx kernel xx.xx generic" and " "ubuntu xx.xx kernel xx.xx generic (recovery mode)" . Choose the recovery mode.

Step 2:  Entering Shell

You will be shown "Recovery menu" with multiple options including "root   Drop to shell prompt". Select this option to enter the shell.with root access.


Step 3 : Resetting the password


Now that you are on root shell, use the following commands to reset your password.

passwd [user_name]
for example,
passwd wiredsoup 

 Follow the instructions, and use the following commands once you are done confirming your new password.

sync
reboot -f


That's it :) enjoy logging into you Ubuntu again.

Thursday, November 15, 2012

I2C (Inter Integrated Circuit Bus) : Serial Communication

I2C quick tutorial

I2C (sometimes 2 is in superscript) and read as "eye-two-see" or "eye-square-see" is a serial communication  protocol introduced by Philips semiconductors in early 80s.

I2C is a 2-wire Interface (TWI) with mostly a single master and multiple slaves , there are multiple master configurations possible too.

I2C signals

  1. Data :  SDA  ===========> Always bi-directional
  2. Clock:  SCL ===========> Bi-directional only in Multi-Master Mode

Ground : GND ==========> Common Ground between the two Devices
5V supply

By convention , I2C operates on 5V signals. So make sure you put a level translation buffer in between  if your device is 3.3V tolerant.

Maximum allowable capacitance on the lines is 400 pF and typical device capacitance is 10 pF. So how many devices are supported on single I2C Bus ?

The communication is always Master initiated, Master (typically a Microcontroller) places the address of Slave device with which Master intends to communicate on the Bus. All Slave devices monitor the SDA pin to determine if Master is sending their address. Only the Slave with Matched address can communicate with Master.

The advantages of I2C other than it being a very low cost to implement are
  • Supports multiple devices on only 3 wires
  • Is implemented in Hardware as well as Software (Bit-Banged I2C)
  • Supports Multi Master configuration
  • Many examples available on the Internet
If I had to belittle I2C I would say , The disadvantages of I2C are
  • Short Distances only
  • Slow Clock speeds (Typically 100Khz)
  • Faster Clocked devices cannot coexist with Slower devices on the same bus

I2C Typical Connections
Both SCL and SDA are Open-Drain drivers, which means that the device can drive it low, but cannot drive it High. To drive the line High, you must provide a pull up through a resistor as seen in the above figure. You only need one pull up for SDA and one for SCL irrespective of how many devices are connected to the bus.

Data Transfer Protocol over I2C

When I2C master wishes to communicate with slave devices, it stars by generating a "Start Condition" on the SDA line. "Start Condition" is defined as SDA line going low while SCL is high. Similarly when Master devices wishes to end the transfer, it generates a "Stop Condition" on the line. Stop Condition is defined as SDA going High when SCL is High.


The receiving device ACKnowledges the transfer after every 8 bits (MSB first), by driving SDA Low for Positive ACK and driving SDA High. This means that there are 9 clock cycles per 8-bits of data. 8-bit data and 1-bit for ACK. If the receiver is not ready to receive any more data, it should keep SDA high for 9th bit so the transmitter aborts the transfer.


Data can change while the SCL is low, but it should not change with SCL is high.

Device Addressing

Device Addressing is another section of I2C that confuses new comers. Addresses on I2C bus are 7-bit, but as explained before, the transfers are all 8-bit + 1-bit for ACK, then where did this 7-bit address come from ? Here is how.


In the images above, it is a little bit more clear as in how the addressing is done in I2C. 7-Bit slave address (128 slave devices addressable ) , 8th bit for is it going to be a Read (1) or a Write (0) command, and 9th bit for ACK from the receiver. Always remember, Even address (8th bit zero)  for WRITE and Odd address (8th bit one) for READ.

Example 1
Here is an example where Master device is writing to a Slave. It starts by addressing a Slave device by its 7-bit Address and putting 8th-bit Low indicating a Write Command.


The "Green" bounded parts are Bits transfered by Master, and everything else is transfered by Slave.

Example 2
Master wants to read from Slave


But it is rarely this simple. Devices have multiple internal registers to which you want to write to or read from, so how do you do that ?

Writing to an internal register of an I2C slave

  1. Start Condition (Put automatically if Hardware I2C is used)

  2. Send I2C address of the slave with R/W bit low (even address) for write.
  3. Send the address of the internal register
  4. Send data byte
  5. Send more data bytes if needed
  6. Send Stop Condition (Automatic if Hardware I2C is being used) 

Reading from an Internal Register of an I2C Slave device

Reading from an I2C slave device having internal registers is a wee bit tricky but not tricky enough to get you boggled up. Read from the slave device starts with a write operation in which we write the internal register address to the slave device which we want to read from.


  1. Start condition
  2. Send I2C address of the slave with R/W bit Low (even Address) for write.
  3. Send the address of the internal register
  4. Send "Start Condition" again, referred to as (Restart) in this scenario
  5. Send the I2C address of the slave device with R/W bit High (Odd address) for read operation.
  6. Read data byte
  7. Read more data byes if needed
  8. Send a stop condition.

I hope this helped :) leave your questions in comments.

Monday, November 12, 2012

How to install Google Analytics in Wordpress


How to Install Google Analytics in WordPress ?

This was my question a few minutes ago, and here is the most simple answer :)
Assuming you have Google Analytics set up. If you haven't then start by signing up for Google Analytics account http://www.google.com/analytics/ , its free and simple.

1 - Copy the code that you received in from Google Analytics, and paste it in your theme’s header.php right above the < / head > tag . [Preferred way] 
OR
2 - Copy the code that you received in from Google Analytics, and paste it in your theme’s footer.php right above the < / body > tag 
Theme's header.php and footer.php can be found by going into your Wordpress dashboard > Appearance > Editor
Now on your right you will see a sidebar listing all your pages. Locate the header.php or footer.php whichever you want.


If its still not working, leave your questions in the comments :)

Enlightenment

Enlightenment

Enlightenment


The image is not at all out of context here ... I happened to meet a relative by a relation I never knew of before that day, and I learned so much from him. He gave me insight into how things work around us... how we are surrounded by conspiracies ... hidden meanings behind all the stuff that we ignore just like that.

It was such a knowledgeable meet that I thought I'd share the enlightenment with others too... *sharing is caring* and after all its not your fault that his highness isn't your relative .

*Spice* has been added ofcourse 

Enlightenment clauses:
  1. Aj kal telecom engineers tou kaddu ki tara pare hain market mein, na koi hath lagata hai na koi poochta hai... bas paray paray sar jatay hain aur phir export ho jate hain.
  2. Mein ne apne bare baitay ko *Multi National * company mein naukri karwani hai, jaise yeh jo Telenor wagera . 
  3. Aj kal internet per paise kamana bohat sokha (easy) ho gaya hai ... pehlay zamanay mein tou mehnat ki kamai hoti thi.
  4. Cheeny salay (Chinese Rascals) bas sasta kaam hi kartay hain hamesha.
  5. Jiss ishtehaar (advertisement) mein bachi na nachay us ishtehaar se kuch nahin bikta.
  6. Tarang ka ishtehaar tou *my favorite* hai.
  7. Shadi 27 saal (27 years) k bad hi karni chahie mard ko.
More enlightenment when he came to know I am a Telecom Graduate , working as a firmware developer in a Private firm.

  1. Dekho na apna haal, Telecom degree ki , kia faida hua ? ab kisi *fum-wea* name ki private company mein kam kar rahay ho. Chinese name lag ra hai *fum-wea*.
  2. Yeh Honda , shonda sab bakwas hai ... mein ne Raavi khareedi hai CD70 , aise bhagti hai jaise khoti k dum per aag ho.
  3. KFC tou best hai.

Noticing I was holding an Android phone 

  1. Goray bhi kia bala (Monster) hain, salay humain in shashkon mein phansa ker khud dunya hila chori hai inhon ne.
  2. Yeh sab Muslims k khilaf sazish ka aik hissa hai mere dost. Yeh camera wala mobile Americans chahain tou kabhi bhi tumharay mobile camera ko istemal kar k dekh sakte hain k tum kahan ho.
  3. Waise yeh tumharay phone (Android) aur iPhone mein farak kia hai ? hai tou iPhone bhi touchscreen... tou wohi le lete.
Last but not least,

  1. Ap ka facebook id kia hai ?
Feel free to translate any of these clauses to your native language... 

Tuesday, November 6, 2012

Income Tax 2012-2013 Slab rates for Pakistan


So I needed these slab rates today to calculate my share of contribution (Income Tax) to our beloved Mr President's doggie bank. I thought it may be useful for others too.
Here are Income Tax rates (Slab rates) for Pakistan for the year 2012 - 2013. All you need now is a calculator.
Tax slabs of salary income has been reduced from 17 to 6 in the finance act 2012-13 which are as under:
  1. Salary Income less than 400000 tax will be 0%
  2. Salary Income exceeds 400000 but does not exceed 750000  tax will be 5% of amount exceeding 400000
  3. Salary Income exceeds 750000 but does not exceed 1500000 tax will be 17500 + 10 % of amount exceeding 750000
  4. Salary Income exceeds 1500000 but does not exceed 2000000  tax will be 95000+ 15% of  amount exceeding 1500000
  5. Salary Income exceeds 2000000 but does not exceed 2500000 tax will be 175000 + 17.5% of amount exceeding 2000000
  6. Salary Income exceeds 2500000 tax will be 420000 + 20% of amount exceeding 2500000.

Good luck to anyone in " 10% "  :)  *pwn intended*

Sunday, February 12, 2012

Photo a day


Photo a day is a new picture organization app by our very own Pakistani group "Smasherzz". The main purpose of the app is literally as its named, i-e a photo a day. Which in my view is also a negative point for the app. But we will get to the details in a moment, first lets have a get go at the app and its features.

Purpose
Photo A Day tries to make it easier for the android user to keep its "a memory a day" picture organized by dates. Its like the movie "Memento" . If he had this app, his life would have been a lot easier :). But unfortunately that's about it. The app does just that.
Though its a great effort but there is much to be longed for in the app.

My experience
I spent around 15 minutes on using and exploring the app for features, but as described above, its literally just "photo a day" app. Nothing more, nothing less. I have seen better apps for the purpose on the market which in my view also lack a couple of essential features which I'll be listing below.

Wishlist
If this app is to be popular or gain number in downloads, the developers will have to put focus on the following areas.

1- UI

The UI is a major turn off and definitely needs work and attention. Here is a screenshot of what the app actually looks like under the icon.


If this app is to make money, UI is the first thing that needs changing.

2- No flick ?

It was a surprise for me when the calendar month didn't change on swipe / flick of the thumb.

3- FC oh my!

If you click on the previous month's date appearing in current month, like in the screen shot above. The app will FC. (Force Close)

4- No ownership of files

I would never like an app to try and take over my base.. "All my base are not belong to you" as the wise Panda once said. It is recommended that the developers use a separate folder to save thumbs of the images assigned.

5- No Timeline ?

In an app that says "photo a day" should have a scroll-able timeline feature to be able to browse through the dates and images.

6- A photo a day ? literally ?

I would like my photos arranged by date, yes Sir. by Month, Yes Sir, but do I have one photo every day ? No Sir. This should be a more of a assign "photos" to a specific date instead of "A photo A day"

7- Sharing is caring

There should be a "share" button which allows sharing images via facebook, Gmail or say MMS ?

8- No cloud sync

If I were to keep this app for a memory of my say , son growing up or my valentine ;) I'd definitely want it to keep my memories safer than an SD card crash away. How about Picasa for sync ? its Google product. Or say your own cloud storage ?

Links :
Facebook
Android Market
QR Code


Saturday, February 11, 2012

Traffic Pakistan


Traffic Pakistan is a newly launched first of its kind traffic reporting service for Pakistan. Currently launched in three major cities:
  • Islamabad
  • Karachi
  • Lahore
Though simple yet a very useful and creative idea brought to life. In Pakistan, you are bound to get stuck in traffic blocks when you leave for someplace. But this innovative service can help you save your time. As it provides latest updates regarding different roads / places in the respective city.

Its a purely user contribution based service, relying entirely on the input by users. More the people start using and contributing it, more useful the service will get because it fetches updates based on users input. 

Amazingly, people of Islamabad have come up with a very unique way of utilizing this service, and that is Updates on CNG pumps in Islamabad.
For example:
  • F7 caltex is serving two lines at a time. Can be time saving
  • long bloody line for cng at pso f8 and caltex f8. Oh my!!
Given the chance, this can be a very useful community.

Using Traffic Pakistan

Getting Updated
Getting updates from Traffic Pakistan is as simple as 
  • Opening the website www.trafficpakistan.com and following your respective city. Search for your point of interest and you are done.
  • Getting updates via SMS is very intuitive and easy to remember, you just send an SMS to +92-312-5554065 containing this text: "traffic islamabad" for last 5 updates related to Islamabad. Or "traffic islamabad islamabad highway" for last 5 updates related to "Islamabad Highway" in Islamabad.

Similarly for other cities, your SMS should be "traffic CityName PointOfInterest" for specific updates about a point of interest or "traffic CityName" for city updates.

Contributing/Updating Traffic Status
Traffic Pakistan does not require any kind of registration to be a contributor, it is open for all. You can be a part of community in two ways,
  • Twitter: When posting updates meant for Traffic Pakistan, use the following "hashtags" in your tweet.And Traffic Pakistan will automatically get updated.
  • #lhrtraffic for Lahore
  • #isbtraffic for Islamabad
  • #khitraffic for Karachi 
  • SMS: If you don't use Twitter, you can still be a part of this fast growing community. You can SMS at +92-312-5554065 starting with the following keywords:
  • lhrtraffic for Lahore
  • isbtraffic for Islamabad
  • khitraffic for Karachi
for example : SMS "isbtraffic faizabad is blocked by protestors" will update Islamabad Channel with the post, its that simple.

On successful post, you will receive an acknowledgement from Traffic Pakistan indicating that your post was successful .

For help, simply SMS "help traffic" on +92-312-5554065 .  Don't forget to save this number/

We at Wired Soup think that given the restrictions and support by the Government in Pakistan, its a very useful service for the community, but its success depends on the usage by the community. Next time you plan to go out shopping, make sure you have checked www.trafficpakistan.com


Wednesday, November 30, 2011

Bit field structures in C – Microcontroller Programming

Theory


When you are working with Microcontrollers you often have to keep status flags for certain events, e-g when you are using a timer, you need to keep track of how much time in milliseconds or seconds have elapsed, but your timers only allows ticks in microseconds, so you count the number of microseconds say 1000 microseconds and “Set” the flag “one_ms” indicating one millisecond has elapsed. And more than likely, this flag “one_ms” is either a “char” type or an “int”. In either case, a char will take one whole byte and an int will take 16/32 bits depending on the architecture. But if you notice, what you needed to convey could have easily been conveyed or kept record of in one bit only. So for one status flag of one bit wide, you pay a price of unused extra bits. That is not all, you also end up having multiple status flag variables, meaning you are wasting a lot of useful resource (memory). And the code gets messy too.
However, there is a better way to keep status flags without wasting the memory or without making the code a mess. And that is by the use of “bit fields”  in C programming.

Bit fields are a special structure member type. A bit field is of type integer but its width is specified by the programmer. For example, ARM7 is has a 32-bit integer, but when I use this “int” data type for a bit field, I can specify the actual size this integer will occupy in memory by specifying the size after a “:”.


struct normal_integer
{
unsigned int millisecond;  //occupies 32 bits in memory
}obj;
===================================================
struct bitField
{
unsigned int millisecond : 4 ;  //occupies 4 bits in memory
}obj;


Bit Fields can be of type “signed integer” , “unsigned integer” or a “bool”.
Keep in mind, the specified size cannot exceed maximum default size of that data type. And, for portability and other holy reasons always specify if you want your bit fields signed or unsigned.

Useful example of Bit Fields

Suppose you are designing a stop watch you have one hardware timer which is capable of counting ticks in microseconds. But you want time in seconds and milliseconds. So what do you do ? You wait and count.
For the stop watch example:


int tick_counter ; //global tick counter
struct lap_time
{
    unsigned int start : 1 ; //one bit flag indicating whether the lap time has started or not
    unsigned int millisecond : 1;  //one bit flag indicating 1 millisecond
    unsigned int ten_millisecond : 1; //one bit flag indicating 10 milliseconds
    unsigned int second : 1;  //one bit flag indicating 1 second
    unsigned int laps_elapsed : 4; //4 bit wide elapsed laps counter

} lap;
void timer_isr( )    //ticks every 10 microsecond
{
    //disable low / equal priority interrupts
    if (lap.start)
    {
        tick_counter ++;
        if(tick_counter == 100)
        {
            lap.millisecond = 1;
        }
        if(tick_counter == 1000)
        {
            lap.ten_millisecond = 1;
        }
        if(tick_counter == 10000)
        {
            lap.second = 1;

           tick_counter = 0;
        }
    }
    //enable low / equal priority interrupts


}
The isr written above is only generic code for the specified example, it does not assume any specific sort of hardware. That is why I have placed comments at the start and end of the ISR for hardware specific routines you need to do.
Link: Bit Fields on wikipedia
Technorati Tags: ,,